

In today’s multi-device world, efficiently sharing a single printer among multiple computers can be a game-changer. Here’s a breakdown of the methods you can use to achieve this:
Method 1: Printer Sharing on a Home Network (Windows)
This is a common and cost-effective solution for computers on the same network.
- Connect the Printer: Physically connect your printer to one computer on your network using a USB cable.
- Enable Printer Sharing: On the connected computer, access the “Devices and Printers” settings. Right-click on your printer and select “Printer properties.” Navigate to the “Sharing” tab and check the box “Share this printer.” Optionally, assign a recognizable name for easier identification.
- Connect from Other Computers: On other computers on your network, open the “Devices and Printers” settings. Click “Add a printer” and select “Network printer.” Windows will search for available shared printers. Choose the shared printer by name and follow the on-screen prompts to install the necessary drivers.
Method 2: Printer Sharing on a Mac
Similar to Windows, Mac allows you to share printers on a network.
- Connect the Printer: Establish a physical connection between your printer and a Mac computer using a USB cable.
- Enable Printer Sharing: Open “System Preferences” and select “Sharing.” Under “Services,” check the box next to “Printer Sharing.” A list of available printers will be displayed. Select the one you want to share.
- Connect from Other Macs: On other Macs on your network, navigate to “System Preferences” and select “Printers & Scanners.” Click the “+” button and choose “Add Printer.” Select your shared printer from the list and follow the prompts to install the drivers.
Method 3: Using a Wireless Printer with Built-in Networking
Many modern printers come with built-in Wi-Fi capabilities, eliminating the need for a physical connection to a single computer.
- Wireless Setup: Follow the manufacturer’s instructions to connect your wireless printer to your home Wi-Fi network. This typically involves accessing the printer’s control panel or a dedicated app.
- Connect from Your Computers: On each computer you want to use the printer with, locate the “Add a printer” option within your printer settings (Windows: “Devices and Printers”; Mac: “Printers & Scanners”). The wireless printer should be discoverable on your network. Select it and follow the on-screen instructions to complete the installation.
Method 4: Utilizing a Print Server (Optional)
For more complex setups or if your printer lacks built-in networking, consider a print server. This is a dedicated hardware device that connects to your network and allows you to share a USB printer with multiple computers.
- Connect the Printer: Physically connect your printer to the print server using a USB cable.
- Configure the Print Server: Access the print server’s web interface (usually through a web browser) and follow the manufacturer’s instructions to configure it on your network.
- Connect from Your Computers: Similar to connecting to a shared printer, use the “Add a printer” function on your computers and select the print server from the network list. Follow the prompts to install the necessary drivers.
Additional Considerations:
- Driver Compatibility: Ensure you have the latest printer drivers installed on all computers that will be using the shared printer.
- Network Security: For a secure network, consider password-protecting your shared printer to restrict unauthorized access.
By following these methods, you can transform your single printer into a multi-device workhorse, streamlining printing tasks and maximizing efficiency across your home or office network.
About Us

Computer Sector@Trading (CST) is the technology distributor of Bangladesh and Current technology sales, marketing and logistics company.
Know MoreProducts
-
 Laptop Battery For HP Compaq 510 520 530 500 Series
2,250.00৳
Laptop Battery For HP Compaq 510 520 530 500 Series
2,250.00৳
-
 Laptop Battery for Asus P2430U P2530U
2,250.00৳
Laptop Battery for Asus P2430U P2530U
2,250.00৳
-
 Laptop Battery for Asus K53 Series
2,250.00৳
Laptop Battery for Asus K53 Series
2,250.00৳
-
 Laptop Battery for ACER V5-400, V5-500 Series
Original price was: 2,400.00৳ .2,250.00৳ Current price is: 2,250.00৳ .
Laptop Battery for ACER V5-400, V5-500 Series
Original price was: 2,400.00৳ .2,250.00৳ Current price is: 2,250.00৳ .
-
 Laptop Battery for HP Compaq CQ42 PAVILION G4 G6 G42 CQ32 CQ42 CQ43 CQ62 MU06
Original price was: 2,500.00৳ .2,250.00৳ Current price is: 2,250.00৳ .
Laptop Battery for HP Compaq CQ42 PAVILION G4 G6 G42 CQ32 CQ42 CQ43 CQ62 MU06
Original price was: 2,500.00৳ .2,250.00৳ Current price is: 2,250.00৳ .
Latest News


Products
-
Laptop Battery for ACER V5-400, V5-500 Series
Original price was: 2,400.00৳ .2,250.00৳ Current price is: 2,250.00৳ .
-
Laptop Battery for HP Compaq CQ42 PAVILION G4 G6 G42 CQ32 CQ42 CQ43 CQ62 MU06
Original price was: 2,500.00৳ .2,250.00৳ Current price is: 2,250.00৳ .
-
 Laptop Battery for Dell Inspiron 13R 14R 15R 17R Series
Original price was: 2,400.00৳ .2,250.00৳ Current price is: 2,250.00৳ .
Laptop Battery for Dell Inspiron 13R 14R 15R 17R Series
Original price was: 2,400.00৳ .2,250.00৳ Current price is: 2,250.00৳ .
-
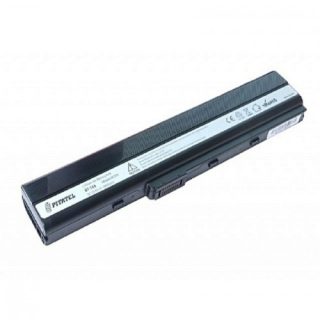 Laptop Battery for Asus A52, K42, K52 Series
Original price was: 2,400.00৳ .2,260.00৳ Current price is: 2,260.00৳ .
Laptop Battery for Asus A52, K42, K52 Series
Original price was: 2,400.00৳ .2,260.00৳ Current price is: 2,260.00৳ .
Leave a Reply